
Learning how to lubricate Trailer Landing Gear helps prevent hard cranking, uneven support, and expensive gearbox damage. During an inspection of Semi Trailer Support Legs, check the grease points, landing-leg tubes, welds, mounting bolts, gearbox, crank handle, and foot plates—not only the visible screw. A practical landing gear maintenance schedule is usually every 90 days or 10,000 miles, with an additional inspection after heavy rain, salt exposure, overloading, or impact. The key components are grease, the gearbox, the crank handle, the worm gear, the thrust bearing, and the correct NLGI 2 EP lubricant.
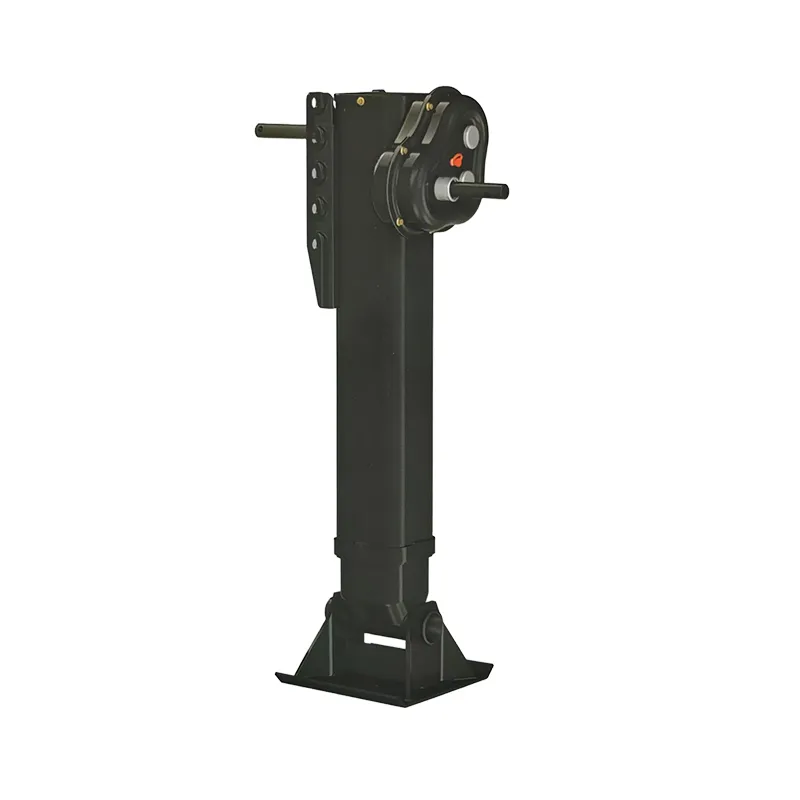
Trailer landing legs carry the front portion of a semitrailer when the tractor is disconnected. They are not designed to correct a badly uneven loading condition or lift a trailer with the landing gear alone. Lubrication reduces sliding and rolling friction inside the screw assembly and gearbox, while inspection detects structural or alignment problems before the legs collapse or become impossible to retract.
Common user complaints usually fall into four categories:
The crank handle becomes difficult to turn: dried grease, a damaged gearbox, a bent screw, or excessive vertical load may be responsible.
One leg moves faster than the other: the cross-shaft, bevel gears, coupling, or mounting alignment may be damaged.
The landing legs retract unevenly: the telescoping tubes may be bent, contaminated with abrasive dirt, or operating under side load.
The landing legs sink into asphalt or soil: the problem may be inadequate foot-plate area or unstable ground, not insufficient lubrication.
In a fleet maintenance record from an anonymized regional carrier, a driver reported that the crank required two hands after the trailer had spent a winter near salted roads. The technician found hardened grease around the exposed screw, rust at the lower tube, and a loose cross-shaft bolt. After cleaning, applying fresh grease, correcting the bolt torque according to the manufacturer’s manual, and replacing the damaged seal, the unloaded crank effort dropped from approximately 18 kgf to 7 kgf during the shop’s functional test. The legs were still removed from service until the bent lower tube was replaced. This case shows why lubrication alone cannot compensate for structural damage.
Park the tractor and trailer on firm, level ground. Apply the tractor parking brake, place wheel chocks on both sides of at least one trailer axle, and keep personnel away from the space beneath the trailer. If the trailer is loaded, do not rely on the landing legs as the only support while working underneath it. Use rated stands or another approved support system positioned according to the trailer manufacturer’s instructions.
Never place any part of your body beneath a trailer supported only by landing gear. A landing-leg failure can occur through a cracked weld, stripped gearbox, sheared cross-shaft, collapsed foot plate, or soft ground. Follow the trailer, landing-gear, and lubricant manufacturers’ instructions if their limits differ from the procedures below.
Manufacturer-approved chassis or landing-gear grease
NLGI 2 EP grease when specified by the landing-gear manufacturer
Clean grease gun with a flexible hose
Wire brush and plastic scraper
Lint-free rags and approved degreaser
Flashlight and inspection mirror
Torque wrench covering the fastener range listed in the service manual
Caliper or steel ruler for measuring wear and clearance
Paint marker for identifying loose fasteners
Wheel chocks and approved trailer support stands
Replacement cotter pins, locknuts, seals, or bolts if required
Do not mix lithium, calcium, aluminum-complex, molybdenum, or synthetic greases unless compatibility has been confirmed. Mixing incompatible products can soften the grease, separate the base oil, or reduce film strength. When the existing lubricant is unknown, remove as much old grease as practical before applying the replacement product.
Inspect the gearbox, cross-shaft, telescoping tubes, mounting brackets, foot plates, and exposed screw areas before adding grease.
Confirm that both legs are extended to a similar height and that both foot plates sit flat. A difference of more than approximately 10 mm between the two legs during normal operation deserves investigation, especially if the difference increases as the legs are cranked.
Look for tilted foot plates, cracked welds, distorted pads, and deep penetration into the ground. On soft ground, use support plates sized for the expected load. A larger pad reduces ground pressure, but it does not repair a damaged leg.
Clean mud and road salt from the outer and inner tubes. Search for:
Longitudinal cracks or buckling
Rust scale deeper than surface discoloration
New polished marks indicating tube-to-tube rubbing
Permanent bends or misalignment
Missing drain holes or blocked drainage paths
Excessive movement when the leg is unloaded
As a practical screening method, measure lateral movement at a consistent point with the leg extended only as permitted by the manufacturer. Compare the result with the service manual or a known-good leg. Do not establish a universal rejection limit from one trailer model; tube diameter, wall thickness, leg length, and bushing design change the allowable clearance.
Examine the upper mounting brackets, gussets, welds, and fasteners. Look for elongated bolt holes, fretting marks, cracked paint around welds, and shiny movement marks. A bolt that appears tight may still be loose if the bracket has stretched or the hole has deformed.
Use the manufacturer’s torque chart rather than a generic torque value. If the manual specifies a prevailing-torque locknut, do not replace it with a standard nut. Mark correctly tightened fasteners with a paint line so that later movement is visible during walk-around inspections.
Check the cross-shaft for bends, missing retaining hardware, damaged universal joints, and excessive rotational backlash. Turn the crank slowly with the trailer safely supported and unloaded from the landing legs. The two legs should begin moving without a sudden jump or grinding sound.
Inspect the gearbox housing for cracks, oil or grease leakage, missing plugs, and water entry. A small amount of backlash can be normal in a worm-gear or bevel-gear drive, but a sudden increase compared with previous inspections indicates wear. Do not continue operating a gearbox that slips, locks, or rotates without moving the legs.
Inspect the visible screw for dry metal, pitting, flattened threads, or heavy rust. Check the thrust-bearing area for abnormal axial movement. The crank handle should remain secured by its retaining pin or keeper and should not have a cracked weld or sharp deformation.
With the landing legs unloaded, compare crank effort with the trailer’s normal baseline. A useful fleet practice is to record the number of turns, approximate effort, unusual noise, and extension height at every quarterly service. A gradual increase is often more useful than a single measurement because it reveals deterioration early.
Brush away loose dirt and scrape off hardened grease around the exposed screw, gearbox plug, grease fitting, and telescoping tube. Wipe the surface with a lint-free rag. Avoid forcing high-pressure water directly into the gearbox or bearing seals because water can carry contaminants past the sealing lip.
Cleaning is important because abrasive particles can become embedded in fresh grease. A thin layer of contaminated grease may increase wear instead of reducing it.
Apply a thin, even film of approved grease to the exposed screw or rack area. Rotate or cycle the landing gear slowly so the lubricant spreads across the working threads. Do not pack the entire outer tube with grease unless the landing-gear manufacturer specifically permits it; excessive grease can collect sand and interfere with drainage.
For a telescoping design with a dedicated grease fitting, pump grease slowly until fresh grease appears at the intended relief point or until the service manual specifies a quantity. Stop if the seal bulges, the fitting becomes unusually resistant, or grease begins forcing past an unintended seal.
Locate the gearbox filler, inspection, or grease port. Remove dirt from around the plug before opening it. Add only the specified lubricant. Some gearboxes use semi-fluid grease, while others use a heavier gear lubricant; NLGI 2 EP grease is not automatically suitable for every gearbox.
After replacing the plug, operate the crank through several complete cycles without load. Listen for grinding, clicking, or a repeating tight spot. A smooth cycle is a positive result, but it does not prove that the gears are undamaged.
Apply grease to designated cross-shaft fittings, universal joints, or support bearings. Wipe away excess material around rotating parts. Excess grease attracts road dust and can spread onto brake components, so keep lubricant away from brake drums, discs, linings, and electrical connectors.
Extend and retract the legs several times within the operating range. Confirm that both legs move together, the crank does not bind, and the foot plates remain aligned. Recheck for leaks, displaced seals, loose retaining pins, and fresh metal particles.
Record the date, trailer identification, lubricant type, technician, observed crank effort, defects, and corrective action. Linfeng recommends treating this record as a trend-monitoring tool rather than a simple “greased” checkbox. A fleet can identify early gearbox wear when the recorded crank effort rises from 7 kgf to 11 kgf over successive services, even before the driver reports a failure.
Quality inspection should combine visual checks, functional testing, and dimensional comparison. The following values are practical screening points, not universal replacement specifications:
| Inspection item | Recommended recording method | Action trigger |
|---|---|---|
| Leg height difference | Measure both legs at the same reference point | Investigate differences above approximately 10 mm |
| Crank effort | Compare unloaded effort with the trailer’s baseline | Investigate a sudden increase of 30% or more |
| Gearbox sound | Listen during slow extension and retraction | Stop operation for grinding, skipping, or locking |
| Fastener condition | Check torque against the manufacturer’s table and inspect paint marks | Repair movement, elongated holes, or missing locking hardware |
| Tube and weld condition | Use a flashlight, mirror, and visual crack inspection | Remove from service for cracks, buckling, or severe corrosion |
| Lubricant condition | Check for water, metal particles, hard lumps, or separation | Clean, replace lubricant, and investigate the source |
For production or refurbishment work, landing-gear assemblies should also be checked for dimensional consistency, weld quality, thread engagement, gear backlash, and load performance according to the applicable product drawing and manufacturer specification. ISO 9001 can support the quality-management process, but it does not replace the landing-gear supplier’s mechanical test requirements.
Problem: Dirt and salt remain on the screw, and fresh grease traps the abrasive material.
Solution: Scrape, brush, and wipe first. If the old grease contains visible metal particles or water, remove it as thoroughly as practical and inspect the screw and gearbox before relubricating.
Problem: The product may be incompatible with the existing grease or unsuitable for the gearbox temperature and load.
Solution: Follow the equipment manual. Confirm NLGI grade, extreme-pressure additives, operating-temperature range, water resistance, and compatibility with seals.
Problem: The trailer is not level, the fifth wheel is too high or low, or the operator tries to lift the trailer using the landing gear.
Solution: Correct the tractor-to-trailer height and coupling procedure. Landing gear should support the parked trailer, not compensate for improper coupling alignment or an overloaded front section.
Problem: One leg rises faster because of a damaged cross-shaft, coupling, gear, or mounting bracket.
Solution: Stop using the assembly until both sides are inspected. Replacing only the crank handle or adding grease will not correct a bent shaft or stripped gear.
Problem: Water enters through seals, plugs, or vents and emulsifies the lubricant.
Solution: Use low-pressure cleaning around sensitive components, dry the assembly, and inspect the lubricant for a milky appearance or corrosion.
Problem: Deep corrosion reduces tube wall thickness and can spread beneath paint or weld toes.
Solution: Measure and compare with an undamaged area. Remove the leg from service when corrosion, cracking, buckling, or weld separation affects load-carrying areas.
Lubrication is not a repair for a cracked weld, bent tube, stripped gear, missing retaining pin, severely elongated mounting hole, or uncontrolled leg movement. Replace or professionally rebuild the assembly when any of these conditions is present:
The crank rotates but the leg does not move.
The gearbox skips under normal unloaded operation.
The leg retracts or extends without crank input.
A foot plate is cracked, detached, or permanently tilted.
The cross-shaft is bent or the coupling hardware is missing.
There is a visible crack in a load-bearing weld.
The leg binds after cleaning and correct lubrication.
Crank effort remains at least 30% above the established baseline.
Replacement parts should match the original rated capacity, leg length, mounting pattern, gear ratio, foot-plate design, and operating direction. Do not install a visually similar leg without confirming dimensional and load compatibility.
Before each trip: Check visible cracks, foot-plate position, crank-handle security, unusual leaning, and obvious lubricant loss.
Every 90 days or 10,000 miles: Clean and lubricate the specified points, inspect the gearbox and cross-shaft, and record functional results.
After winter or coastal operation: Remove salt deposits, inspect corrosion, and check seals and drainage areas.
After impact or overload: Perform a complete structural and dimensional inspection before returning the trailer to service.
During annual preventive maintenance: Compare crank effort, leg alignment, gear backlash, fastener condition, and tube clearance with previous records.
Effective trailer landing gear maintenance has four stages: make the trailer safe, inspect the structure and drive system, clean before lubricating, and verify operation after service. Use the specified grease rather than assuming every NLGI 2 EP product is interchangeable. Record measurable results such as crank effort, leg-height difference, gear noise, fastener condition, and corrosion findings. When a leg is cracked, bent, slipping, or binding, replacement is safer than adding more grease.
Previous: Trailer axle maintenance guide for transport fleets
Next: Best Practices for Storing and Maintaining Concrete Pump Pipes
Copyright:@2020-2021

Comments Please sign in or sign up to post.
0
0 of 500 characters used