
Keeping your hedge shears sharp is essential for clean cuts, healthy plants, and effortless trimming. Dull blades tend to crush stems instead of cutting them, which can damage shrubs and make your gardening work harder than it needs to be. With a few simple tools and proper technique, you can restore your hedge shears to like-new performance.
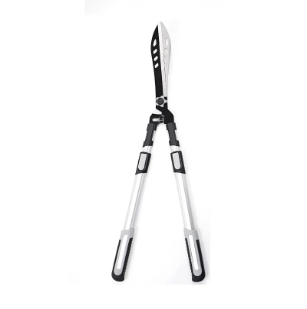
Over time, hedge shears naturally become dull due to repeated contact with branches, dirt, and sap. Sharpening helps:
Improve cutting precision
Reduce strain on hands and wrists
Prevent plant damage and tearing
Extend tool lifespan
Well-maintained blades also make trimming faster and more enjoyable.
Before you begin, prepare the following:
Flat file or sharpening stone
Wire brush or cloth
Gloves (for safety)
Vice or clamp (optional but helpful)
Light machine oil
Start by removing dirt, sap, and rust from the blades. Use a wire brush or damp cloth to thoroughly clean both cutting surfaces. If there is heavy sap buildup, a little solvent or soapy water can help.
Clean blades allow you to clearly see the edge and sharpen more effectively.
For safety and control, place the shears in a vice or clamp. If you don’t have one, hold them firmly on a stable surface, making sure the blades are fully open.
Most hedge shears have only one beveled (angled) cutting edge on each blade. This is the side you should sharpen.
Avoid sharpening the flat side, as this can damage the blade alignment and reduce cutting efficiency.
Using a flat file or sharpening stone:
Follow the original angle of the blade (usually 20–30 degrees)
Push the file in one direction along the edge (away from your body)
Use smooth, even strokes
Repeat 10–20 times or until the edge feels sharp
Do this for both blades.
Tip: Keep the pressure consistent to maintain an even cutting edge.
After sharpening, you may notice small metal burrs on the opposite side of the edge. Lightly run the file or stone along the flat side once or twice to remove them.
This ensures a smooth, clean cutting action.
Wipe the blades clean to remove metal filings. Then apply a thin layer of machine oil to:
Prevent rust
Reduce friction
Improve blade movement
Also oil the pivot joint for smoother operation.
Try cutting a small branch or piece of shrub. A properly sharpened hedge shear should:
Cut cleanly without crushing
Open and close smoothly
Require minimal force
If not, repeat light sharpening as needed.
To keep your hedge shears in top condition:
Clean after every use
Avoid cutting soil or hard wire
Store in a dry place
Sharpen lightly before each gardening season
Sharpening your hedge shears is a simple maintenance task that delivers big results. With just a few tools and a little practice, you can keep your blades razor-sharp, ensuring precise trimming and healthier plants throughout the season.
Previous: None.
Copyright:@2020-2021

Comments Please sign in or sign up to post.
0
0 of 500 characters used