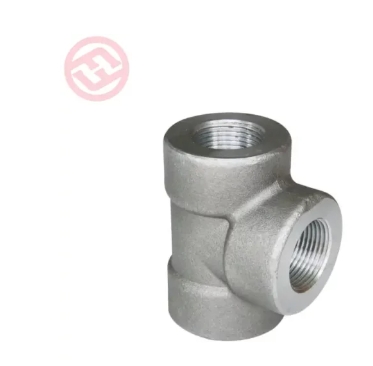
Disassembling a forged pipe fitting involves reversing the steps of its installation while taking care not to damage the fitting or surrounding components.
Shut Down the System: Before disassembling the fitting, shut down the system and relieve any pressure or fluid inside the piping.
Inspect the Fitting: Visually inspect the fitting and surrounding area for any signs of damage, corrosion, or leaks. This assessment can help identify potential issues before disassembly.
Prepare the Work Area: Clear the area around the fitting and ensure you have sufficient space to work. Prepare a clean and stable surface to place the disassembled components.
Loosen Connections: If the forged pipe fitting is threaded, use an appropriate wrench to loosen the threaded connections. Turn the fittings counterclockwise to loosen them from the pipes or other components.
Unscrew Fittings: Carefully unscrew the fittings from the pipes or other components. Take care not to apply excessive force, as this can damage the threads or cause the fitting to deform.
Inspect Threads: Inspect the threads of both the fitting and the pipe for any signs of damage, wear, or corrosion. Clean the threads if necessary to remove any debris or buildup.
Apply Lubricant: If the threads are corroded or difficult to loosen, apply a penetrating lubricant to help loosen them. Allow the lubricant to penetrate for a few minutes before attempting to loosen the fittings again.
Use Proper Tools: Use the appropriate tools, such as wrenches or pipe vices, to safely and securely hold the fittings and pipes during disassembly. Avoid using tools that may damage or deform the components.
Disconnect Seals or Gaskets: If the forged pipe fitting is equipped with seals or gaskets, carefully remove them from the fitting and inspect their condition. Replace any damaged or worn seals before reassembly.
Clean Components: Once the fittings are removed, clean the components, including the fitting, pipes, and seals, using a suitable solvent or cleaner. Remove any debris, rust, or residue from the surfaces to ensure a clean and smooth fit during reassembly.
Inspect Components: Inspect all disassembled components for signs of damage, wear, or corrosion. Replace any damaged or worn parts as necessary to maintain the integrity of the piping system.
Store Disassembled Components: Store the disassembled components in a clean and dry area until they are ready for reassembly. Take care to protect the components from damage or contamination during storage.
By following these steps, you can safely and effectively disassemble a forged pipe fitting, allowing for inspection, maintenance, or replacement as needed. Remember to exercise caution and use appropriate tools and techniques to prevent damage to the fitting or surrounding components.

Previous: WPC Production Line: Enhance Your Manufacturing Efficiency in China
Next: How Bottle Injection Molding Machines Revolutionize Manufacturing
Copyright:@2020-2021
Comments Please sign in or sign up to post.
0
0 of 500 characters used